Table of Contents

Continue is an open-source AI code assistant for VS Code and JetBrains that keeps you in flow while you code: Ask questions about your codebase with Chat, make targeted edits without switching context with Edit, get inline suggestions as you type with Autocomplete, and hand off complex development tasks to Agent — all without leaving your IDE.
By integrating SiliconFlow APIs into Continue, you can get access to 200+ open-source models, including frontier models like DeepSeek V4 series, GLM-5.1, and Kimi K2.6 — with cache support for faster and more cost-efficient inference. All accessible through one single API key.
This guide will walk you through connecting SiliconFlow into Continue in VS Code, from getting your API key to configuring chat models, setting up Tab autocomplete, and verifying everything works end to end.
Step 1: Prerequisites
Get Your SiliconFlow API Key
Before you begin, ensure you have a valid SiliconFlow account:
Register a SiliconFlow account at https://cloud.siliconflow.com/. You can sign up with Google or GitHub.
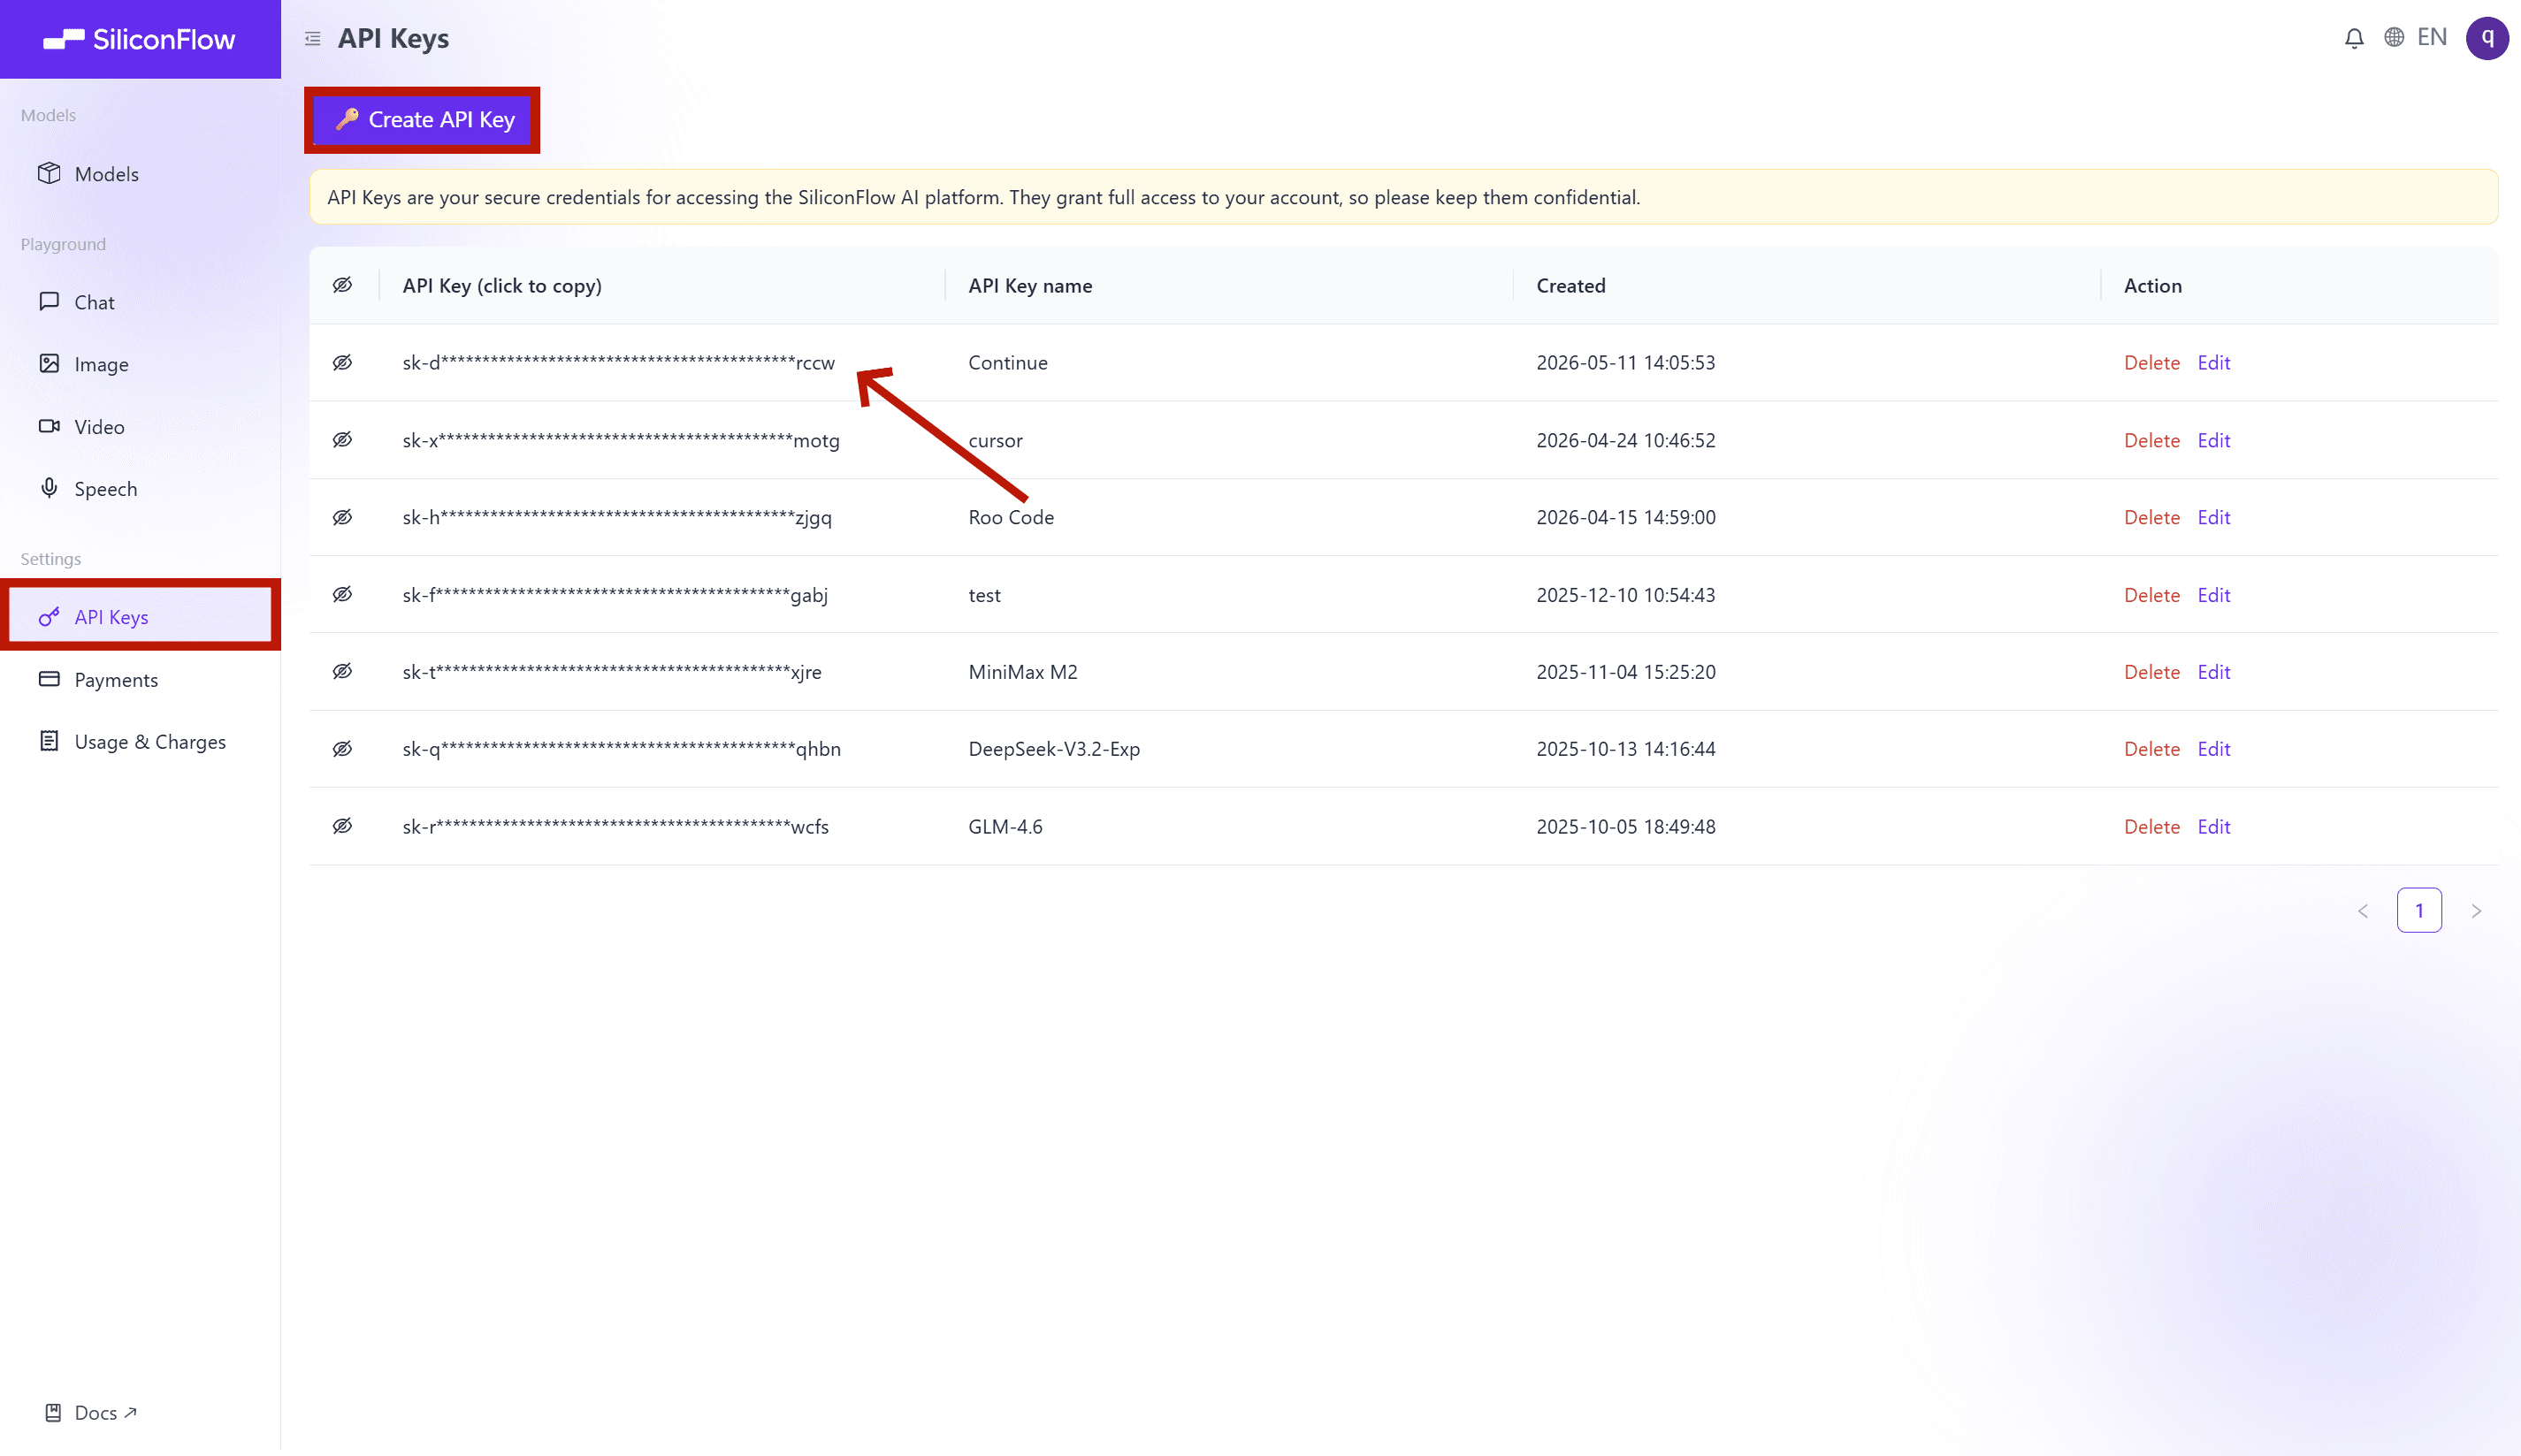
Log in and navigate to API Keys in the dashboard.
Click 🔑Create API Key and add a name to your key to help you identify it later, then confirm to create it.
Click the API key to copy it automatically.
⚠️ Note: Keep your API key secure; you will need it for the configuration in Step 3.
Step 2: Install Continue
Open VS Code, click the Extensions icon in the left Activity Bar (Ctrl+Shift+X / Cmd+Shift+X), search for "Continue", and click Install.
💡 You can also open the extension page directly from the Visual Studio Marketplace, clicking Install there will redirect you to VS Code, where you'll complete the installation the same way.

Step 3: Configure SiliconFlow APIs
Once Continue is installed, open the configuration file to set up your SiliconFlow models:
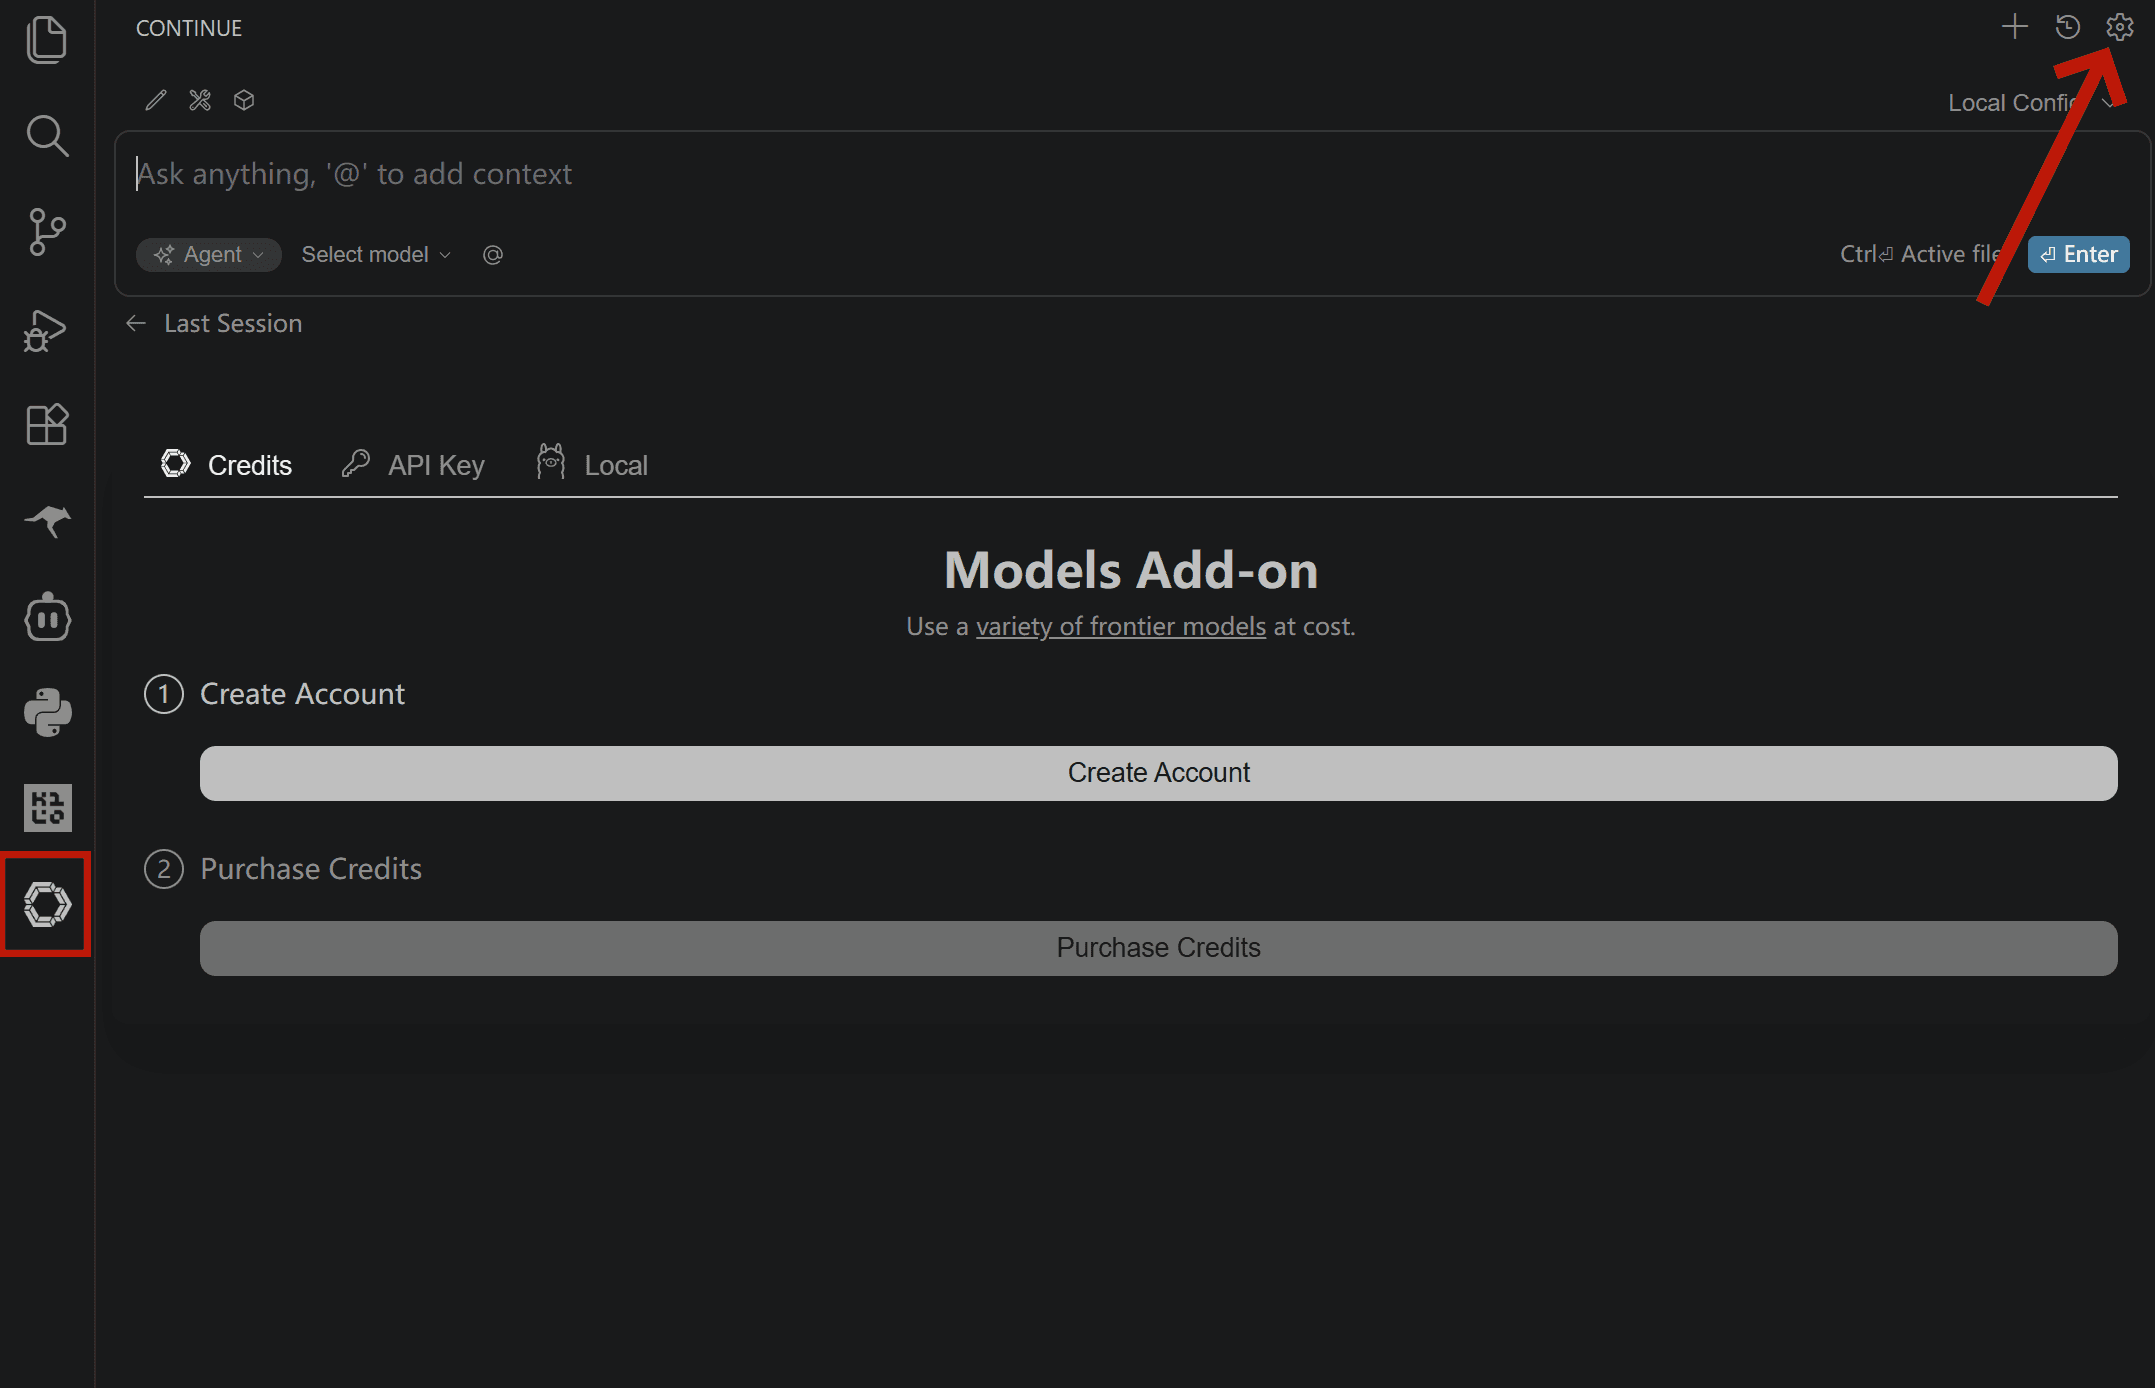
Click the Continue icon in the Activity Bar on the left
Click the settings icon in the top right corner of the Continue panel
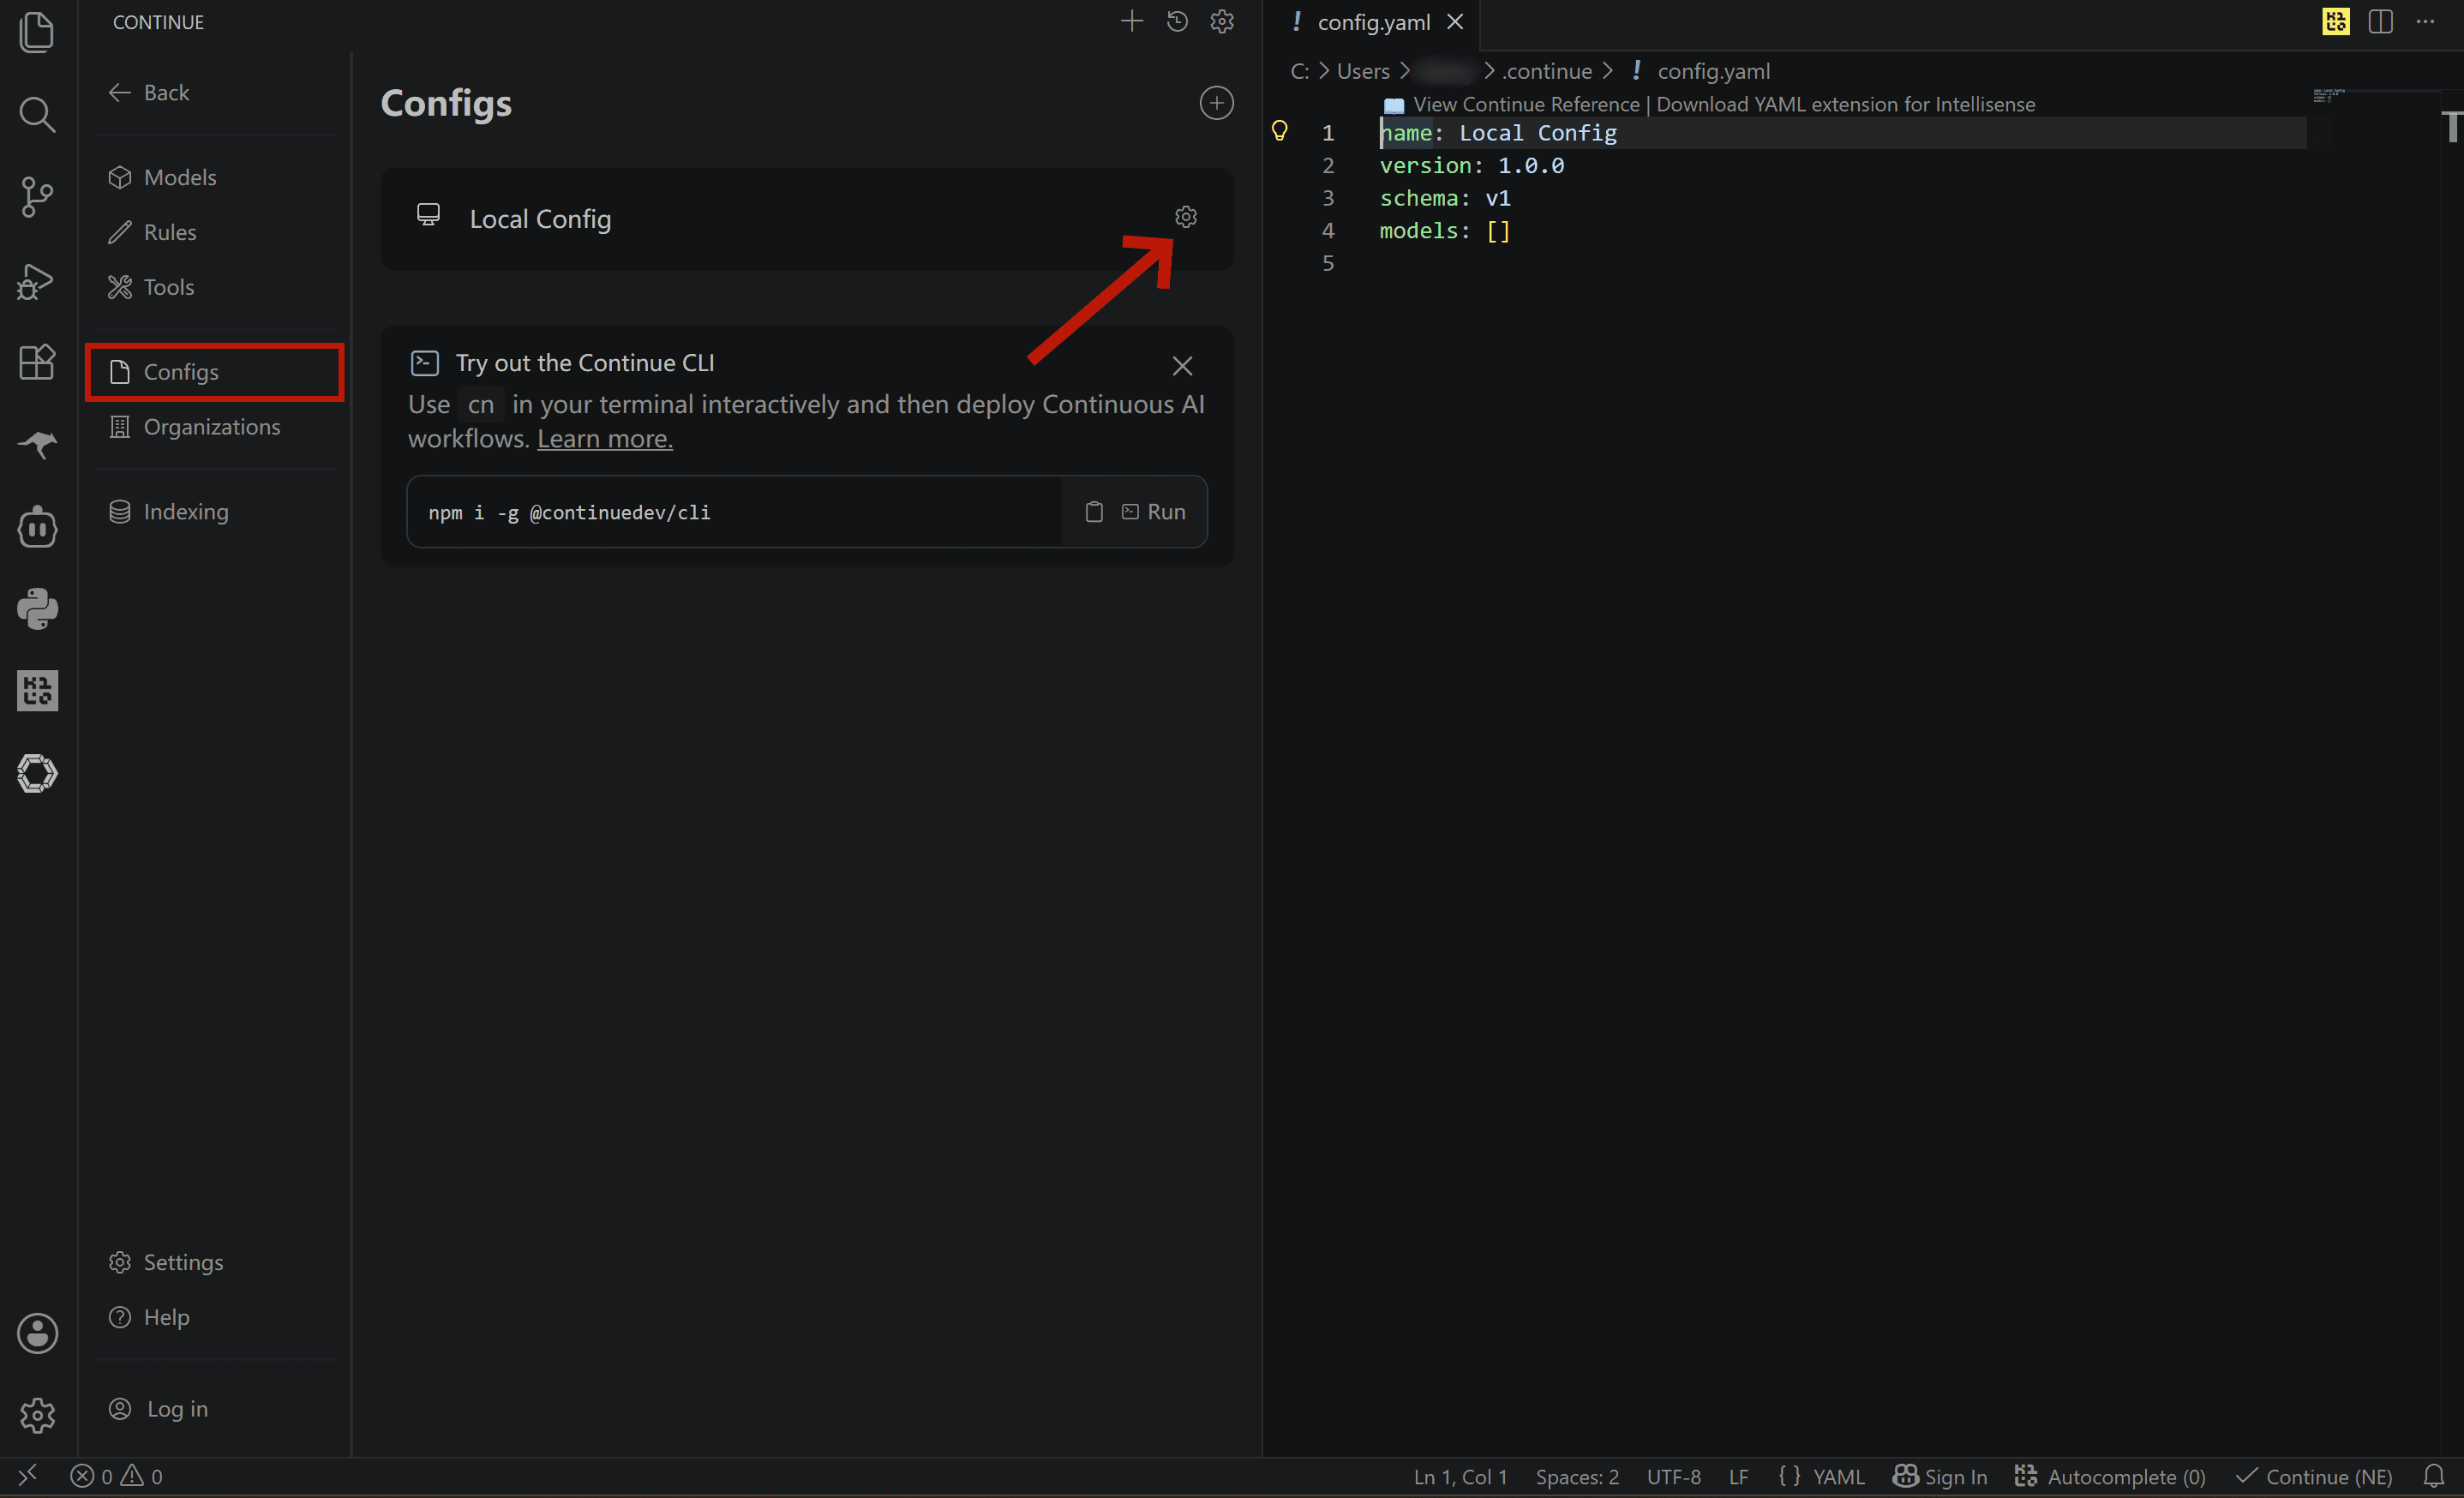
In the left sidebar of settings, select Config
Click the settings icon next to Local Config and your config.yaml will open automatically
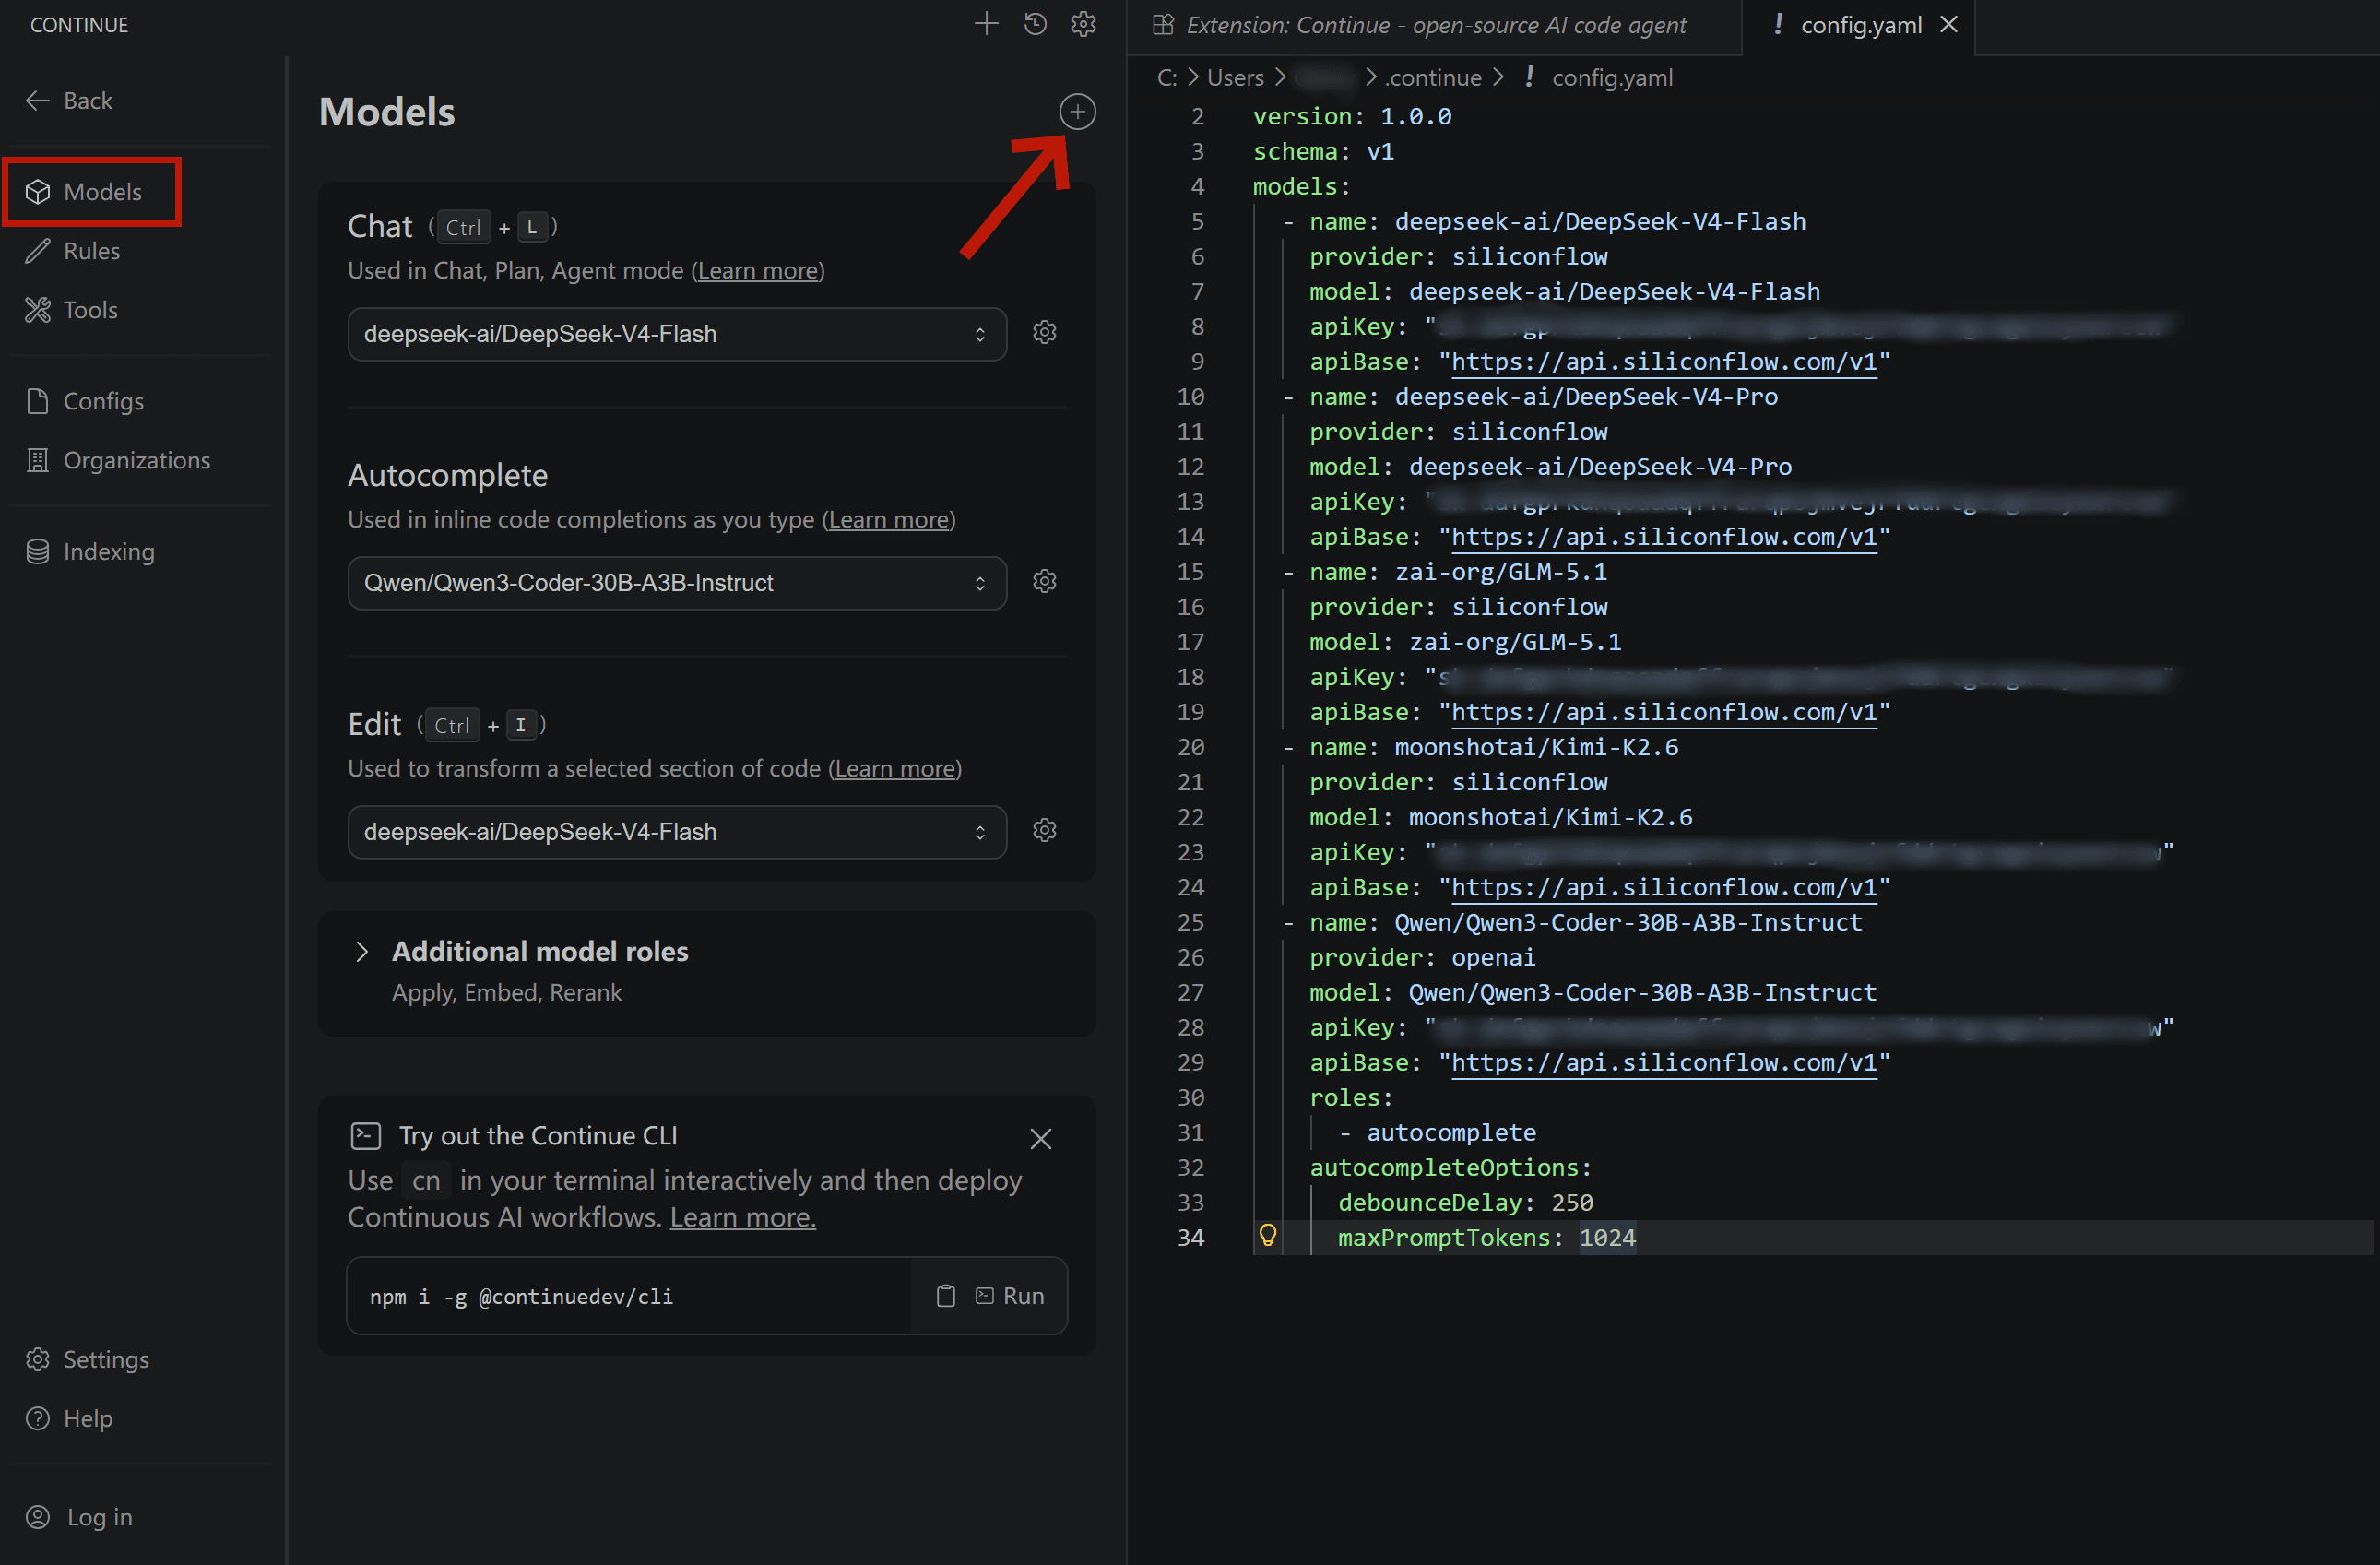
Configure your chat models
Add your SiliconFlow models to the models list in config.yaml. You can configure multiple models and API keys in a single file. The example below sets up four models: deepseek-ai/DeepSeek-V4-Flash, deepseek-ai/DeepSeek-V4-Pro, zai-org/GLM-5.1, moonshotai/Kimi-K2.6.
Not sure which model to pick?
Model | Best for | Key highlights |
Fast, cost-effective coding chat / large codebase | 1M context · 3 reasoning modes · best value in the V4 series | |
Complex reasoning / large codebase | 1M context · #1 open-source on math, STEM & competitive coding · approaches Opus 4.6 | |
Long-horizon agentic tasks | 58.4 on SWE-Bench Pro · long-horizon execution · iterative self-improvement | |
Long-horizon tasks / Frontend generation / multi-agent | Agent swarm architecture · long-horizon coding · prompt-to-frontend generation |
Cache More, Spend Less
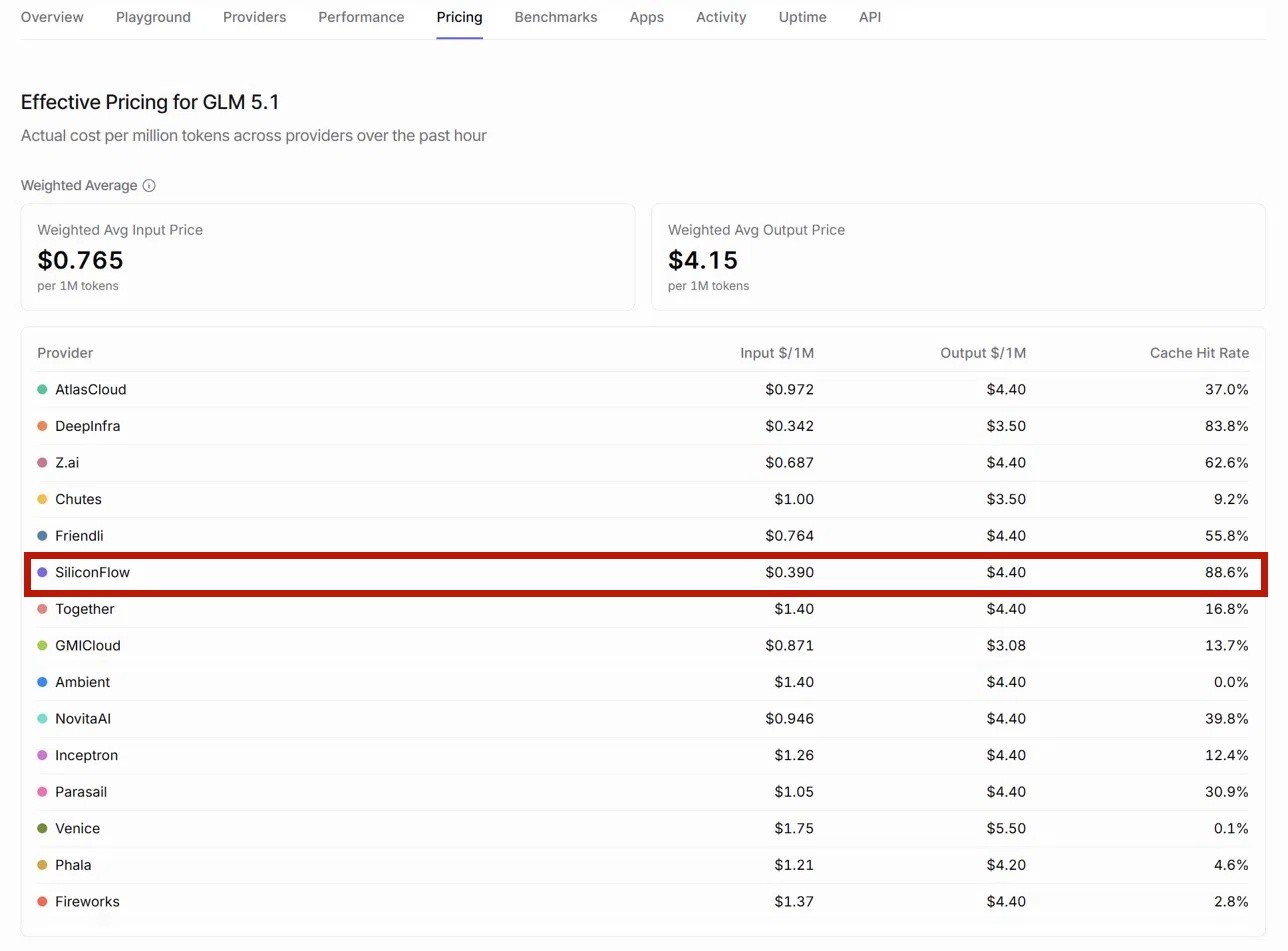
All four models above are hosted on SiliconFlow with context caching enabled. SiliconFlow consistently delivers high cache hit rates across models — for example, according to OpenRouter's provider performance data, SiliconFlow achieves the highest cache hit rate among all GLM-5.1 providers at 88.6%, significantly ahead of the competition. For you as a developer, this translates directly to faster response times and lower inference costs on repeated context.
Looking for more models? Browse the full model library at SiliconFlow Models or stay up to date with the latest releases on the SiliconFlow Blog.
Configure Tab Autocomplete
To enable GitHub Copilot-style Tab completion, add the autocomplete model to your models list with roles: - autocomplete.
We recommend Qwen/Qwen3-Coder-30B-A3B-Instruct for its fast response time — as a MoE model that activates only 3B parameters per token, it delivers low-latency completions without sacrificing code quality.
Note: Avoid using large thinking-mode models for autocomplete — they generate more slowly and are not suited for real-time completion scenarios.
Complete config.yaml Example
To get started quickly, replace your existing config.yaml with the full template below.
Note: Replace all instances of YOUR_SILICONFLOW_API_KEY with your actual API key before saving.
Step 4: Verify Your Setup
Save and reload
Save config.yaml. Continue reloads configuration automatically in most cases. If changes don't take effect, restart your IDE.
Test chat
Open the Continue chat panel. All models defined in your config will appear in the model selector — pick any one, send a test message such as "Hello", and confirm you receive a response.
Test autocomplete
Open any code file (e.g. a Python file), type a snippet like def quick_sort(arr):, and pause for a moment. If a grey inline suggestion appears after your cursor, Tab autocomplete is working correctly.
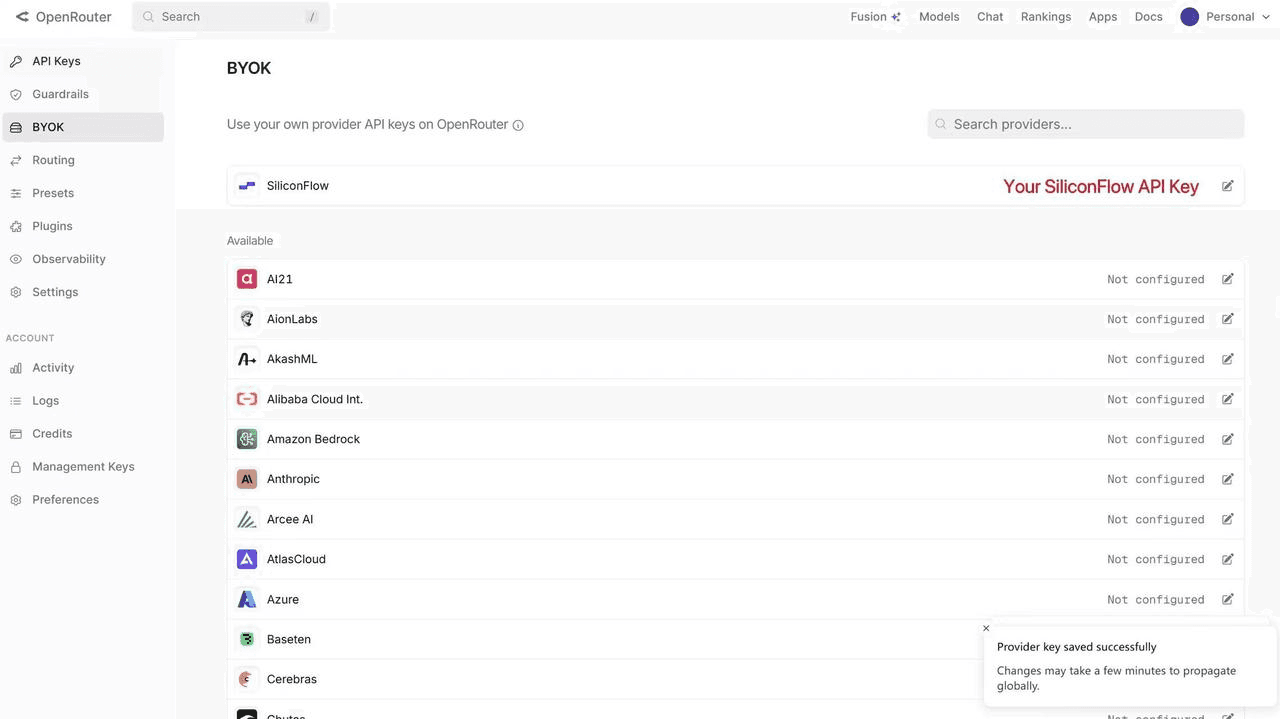
Already Using OpenRouter?
If you already have an OpenRouter account, you can connect your SiliconFlow API key via BYOK.
Once connected:
Requests draw from your SiliconFlow balance first
Billing and rate limits stay in your SiliconFlow account
OpenRouter's fallback routing still works to improve reliability
Bonus: OpenRouter waives platform fees on your first 1M BYOK requests per month.
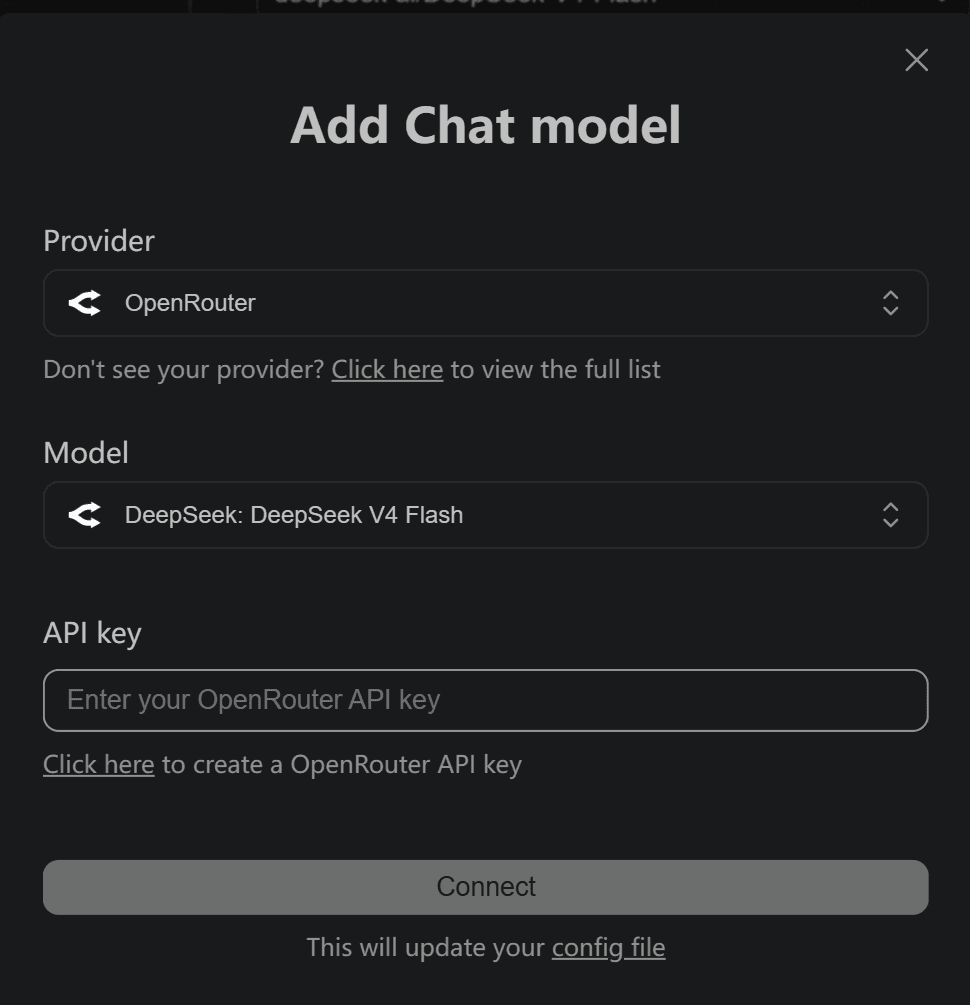
To set it up in Continue with OpenRouter API Keys:
Open the Continue panel and click the settings icon in the top right corner
In the left sidebar, select Models
Click the + icon next to Models
Select OpenRouter as the provider
Choose your desired model and enter your OpenRouter API key
Resources
Continue
Website: https://continue.dev/
OpenRouter
BYOK Setting: https://openrouter.ai/workspaces/default/byok
SiliconFlow on OpenRouter: https://openrouter.ai/provider/siliconflow
SiliconFlow
Website: https://siliconflow.com
API Documentation: https://docs.siliconflow.com
Model Library: https://siliconflow.com/models
